
Moving to a new PSA often stalls on one question: what happens to everything in the old system? In Xcellerate OPS you bring your customers, deals and time across yourself, with CSV files and a bit of preparation. No consultant and no migration project.
TL;DR
- The CSV import wizard imports companies, contacts, opportunities, quotes and contracts, with automatic delimiter detection and field mapping.
- Coming from Clockify? Import your existing time by CSV; administrators can enter time on behalf of others and bulk edit entries.
- Create your custom fields first, import in the right order and check the result on the Companies list.
What you can import
There are two routes, both based on CSV.
Customer and sales data. The CSV import wizard imports companies, contacts, opportunities, quotes and contracts. It detects the delimiter automatically, so it doesn't matter whether your file uses commas or semicolons (common in many European Excel exports). You then map your columns to fields in OPS.
Time from Clockify. The Clockify migration imports your existing time entries by CSV. Administrators get on-behalf entry and bulk edit, so they can complete and correct the team's entries after the import.
For time, we only describe Clockify here, because it is the time tool with a dedicated migration route. If your hours come from another tool, this article doesn't cover a specific route for it.
Adding your customers is also one of the items on the "Finish setting up" checklist on the Settings home page. After the import you can tick it off.
Step 1: Export and clean your data
Export from your old CRM, PSA or spreadsheet, and open the files before you import anything. Cleaning first is always faster than fixing afterwards.
- Remove duplicates. "Acme", "Acme Ltd" and "ACME ltd" become three companies if you leave them.
- One company per row. No merged cells, no second address squeezed into the same row.
- Consistent formats. Pick one way to write countries (always "Belgium" or always "BE") and one way to write VAT numbers (for example always BE0123456789, without dots or spaces). Mixed formats make filtering and reporting harder later.
- Use the same company name everywhere. Make sure contacts, deals, quotes and contracts carry the company name exactly as it appears in your companies file. That makes mapping and checking afterwards much simpler.
- Leave dead weight behind. Prospects from years ago you will never call again don't need to come along.
Step 2: Create custom fields before you import
Did your old tool have fields OPS doesn't have by default, such as a customer number, a contract tier or an internal code? Create them first. OPS supports custom fields on companies, contacts, deals, quotes, contracts, tickets, projects and tasks, optionally shown in lists and on the portal.
The order matters. Field mapping can only map a column to a field that already exists. Create the field after the import and that column has nowhere to go.
Step 3: Import in the right order
Records refer to each other, so work from the top down:
- Companies: the anchor for everything else.
- Contacts: the people at those companies.
- Opportunities, quotes and contracts: the commercial layer that belongs to a company.
- Time: last, once the customers those hours belong to exist.
For each type, start with a small test file of about ten rows. Check the mapping, look at the result, then import the full file. That is quicker than cleaning up a thousand wrongly mapped records.
Do you have customers in another currency, for example in Switzerland or the UK? OPS keeps a currency per company, with a daily exchange-rate sync. Check the currency of those companies after the import.
Step 4: Bring over your time from Clockify
Export your time entries from Clockify as CSV and import them into OPS. Two things help administrators afterwards:
- On-behalf entry: add time for a colleague, for example an entry that was missing from the export.
- Bulk edit: change a batch of entries at once instead of one by one.
Watch two points:
- Hours you already invoiced. OPS can generate invoices from unbilled time. Review historical entries you already invoiced in your old setup, so they aren't billed twice.
- Import first, lock afterwards. In the time and timesheets settings you can lock entries on or before a date. After that, nobody can create, change or delete time in that period, not even administrators. So import and correct your historical time first, and only then set the lock.
Step 5: Check the result on the Companies list
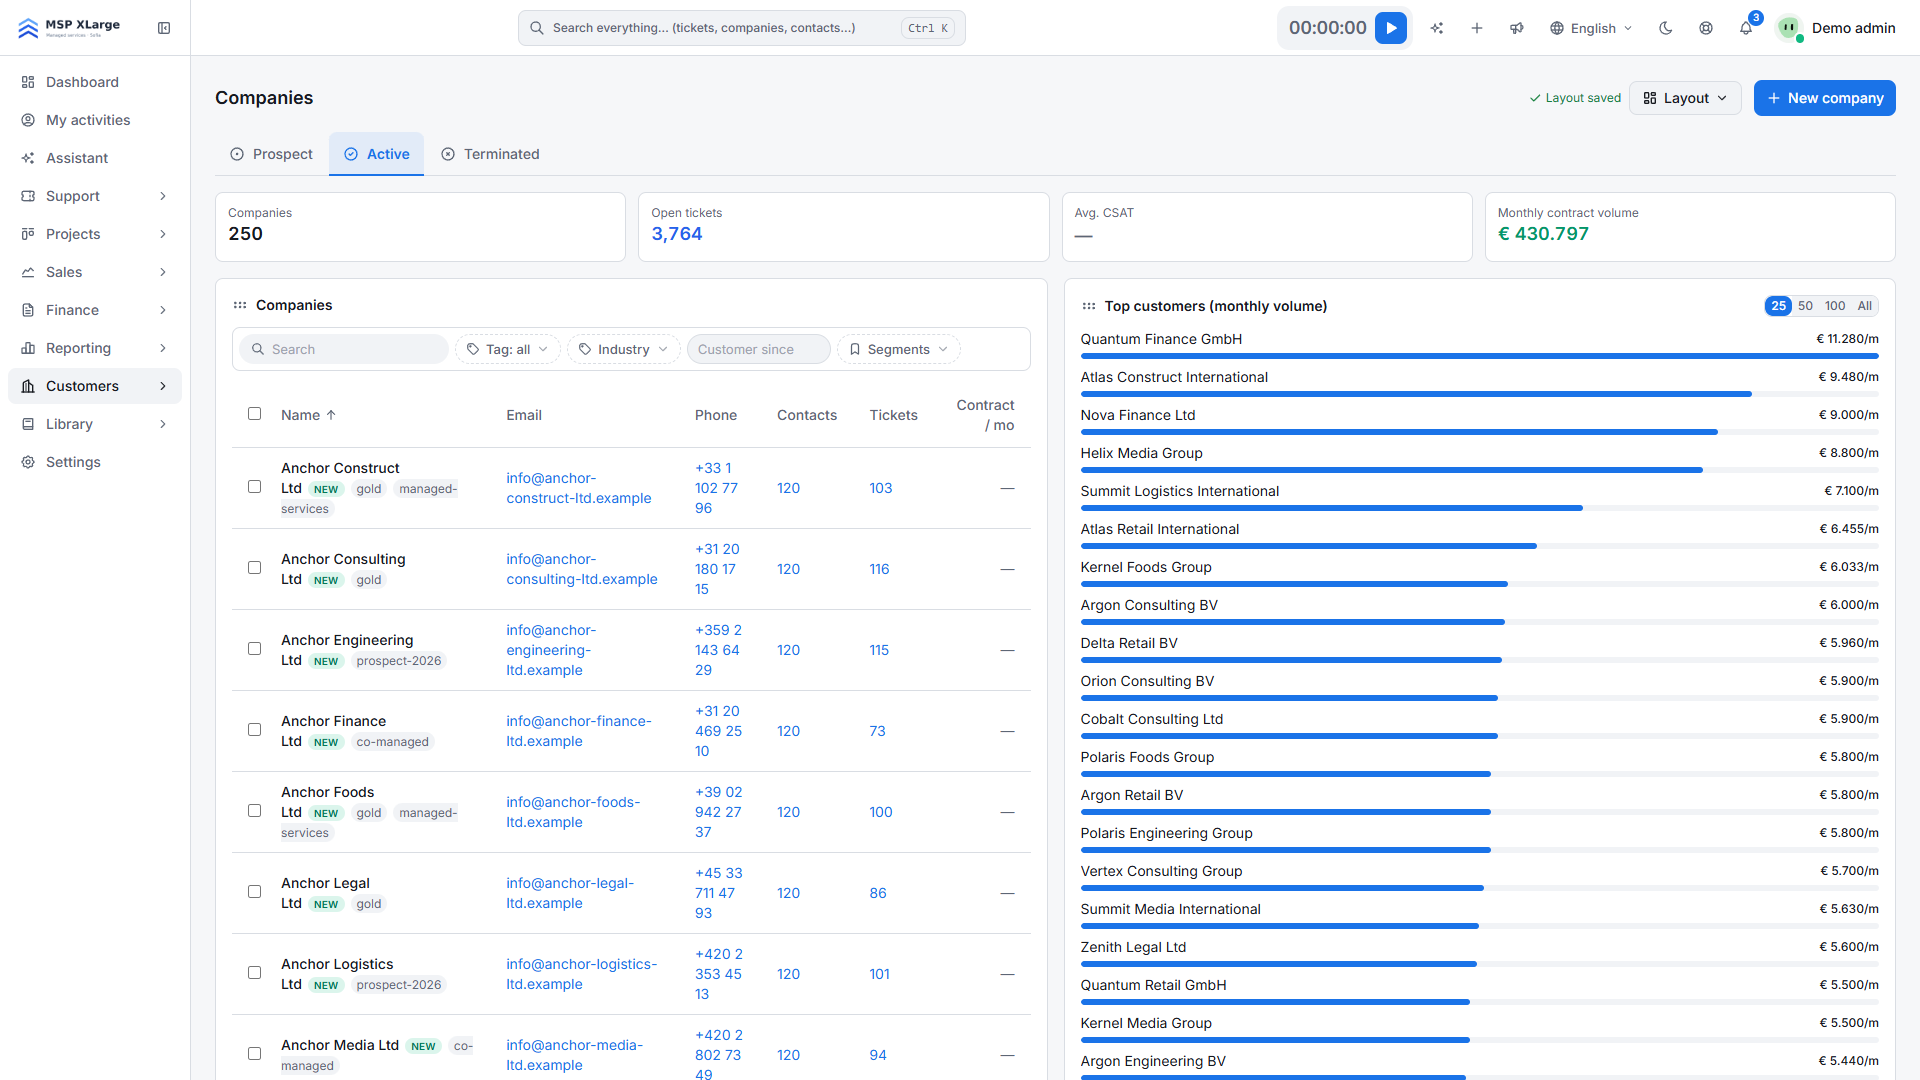 The Companies list with KPIs for companies, open tickets and monthly contract volume, filters and the top customers by monthly volume.
The Companies list is your quickest check. Does the number of companies match your file? Do the filters by tag, industry and segment return what you expect? Does the top customers panel by monthly volume look plausible once your contracts are in? If a customer you know well is missing from the top, check its contracts first.
Then open a handful of companies at random and check that contacts, deals and custom fields ended up in the right place.
Common mistakes
- Importing contacts before companies. The contacts then have nothing to attach to.
- Forgetting custom fields. Columns without a matching field have nowhere to go in the mapping.
- Mixed country and VAT formats. They make filtering and reporting messy.
- Importing the full file straight away. Always test with a few rows first.
- Setting the time lock too early. It also blocks your own corrections.
Next steps
With your customers in place, the rest of the setup gets easier. If you haven't yet, read "Your first hour in Xcellerate OPS" for the basics, and "Stop losing billable minutes" to capture time properly from day one.
With clean files, you can do this migration yourself, without outside help. Get started for free and import your first test file today.