
Every MSP knows the feeling: the month is closed, the invoices are out, and you still suspect a few hours of work never made it onto them. A five-minute password reset here, a quick remote session there. This guide shows how to set up time tracking in Xcellerate OPS so billable time is captured while the work happens, checked once a week and ready to invoice.
TL;DR
- Capture time on the ticket or project task itself, with the top-bar timer or quick add, in h:mm or plain minutes.
- Technicians submit a weekly timesheet and the team lead approves it before anything is invoiced.
- Invoice approved billable time from unbilled time, then lock the period.
Step 1: Set your rules in the time and timesheets settings
Open Settings and, under People and access, go to Time and timesheets. This is where you decide what a valid time entry looks like in your workspace.
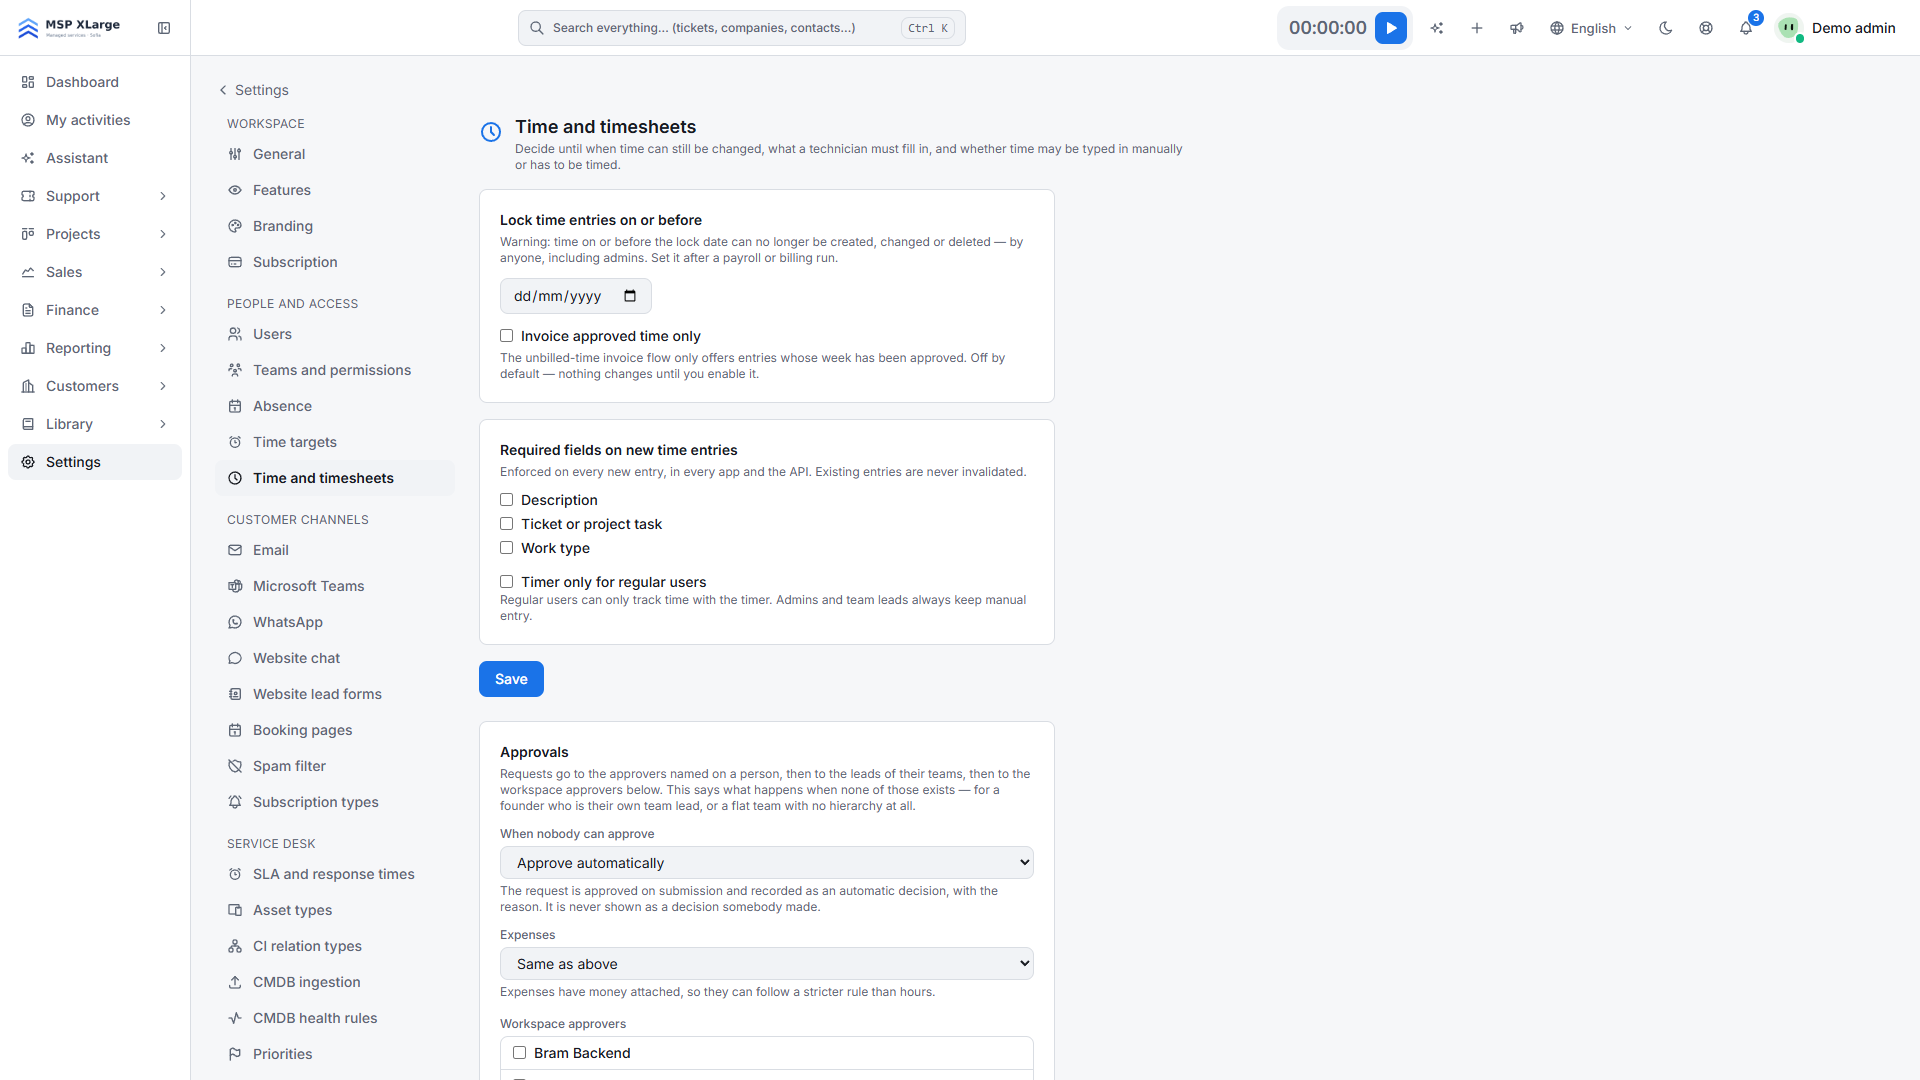 The time and timesheets settings with the lock date, invoice approved time only, required fields, timer-only for regular users and approval routing.
What you will find there:
- Required fields on new entries: description, ticket or project task, and work type.
- Timer only for regular users: technicians log time with the timer; admins and team leads can still enter time manually.
- Invoice approved time only: only time that has been through approval is invoiced.
- Lock time entries on or before a date: nobody can create, change or delete entries on or before that date, not even admins.
- Approval routing: approvers per person, then team leads, then workspace approvers. You also choose what happens when nobody can approve (for example, approve automatically), with a separate rule for expenses.
A setup that works for most MSPs:
- Require a ticket or project task and a description on every entry. An entry without context is an entry you cannot bill.
- Turn on invoice approved time only.
- Route approvals to team leads. No teams or team leads yet? That is covered in "Teams, permissions and security".
- Decide whether you want timer-only. It suits teams that tend to reconstruct their week afterwards. Keep in mind that only admins and team leads can then enter time manually.
Step 2: Capture time where the work happens
In OPS, time lives on the work itself. The live timer sits in the top bar, and quick add is available on tickets and project tasks. Durations go in as h:mm or plain minutes, and each entry is marked billable or not.
On the service desk, time tracking sits on every ticket, together with the materials used. The conversation, the time spent and the parts delivered stay in one place. The full ticket lifecycle is described on the service desk feature page.
Step 3: Submit and approve weekly timesheets
Every entry flows into timesheets. Technicians see their own week in My timesheet. Managers get the team grid, with week and month views.
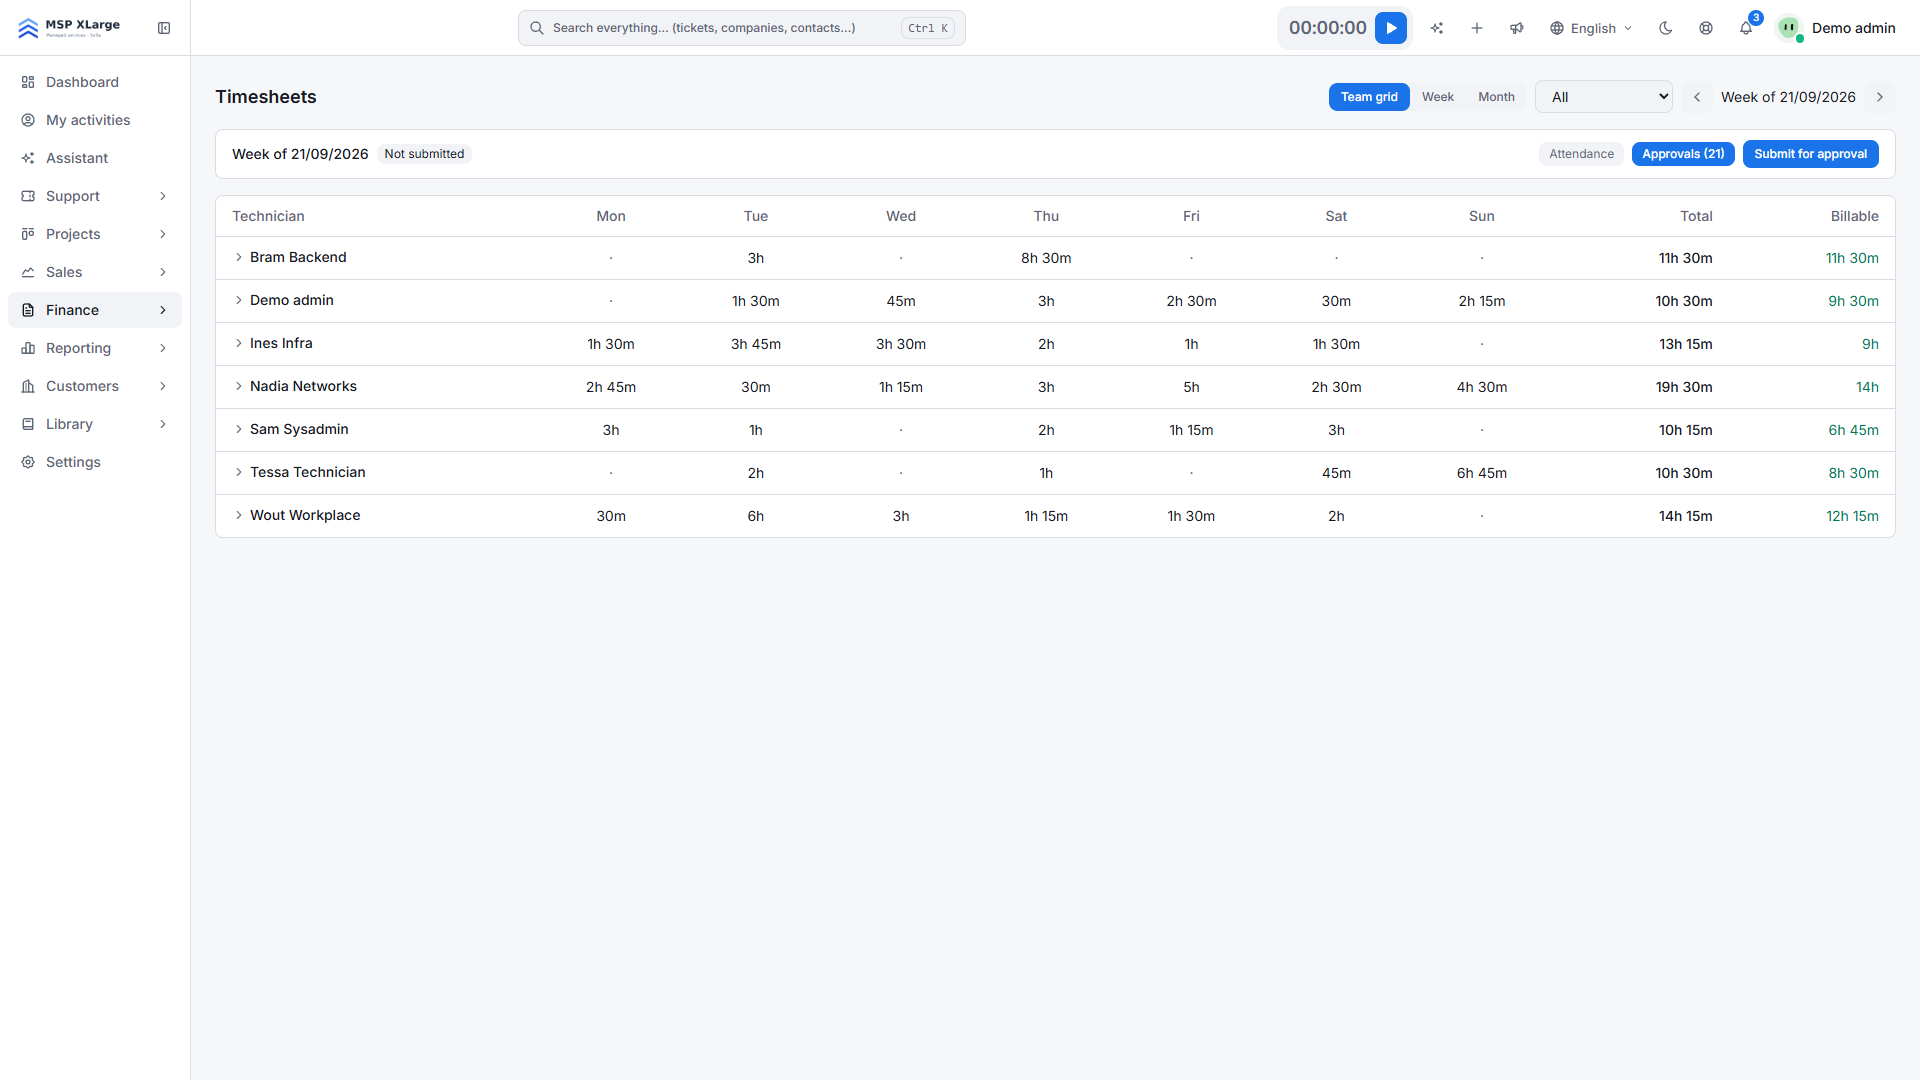 The team grid shows hours per technician per day, with total and billable hours, plus Attendance, Approvals and Submit for approval.
We recommend a fixed weekly rhythm: technicians submit their week for approval on Friday, the team lead reviews the grid on Monday and approves. Because required fields are enforced on new entries and timesheets are checked against them, incomplete entries surface early, not when you are building the invoice. Timesheets, absence and attendance are covered on the time and billing feature page.
Step 4: Set rates and invoice approved time
Rate cards can be set by person, team or client, so the same hour is priced correctly for each customer. Approved billable time and approved project expenses then feed profitability and invoicing in one flow: you generate invoices from unbilled time instead of copying hours into a spreadsheet. Finalised invoices can be pushed to your accounting platform, such as Exact Online, Odoo or Xero, and paid online. More on the sales and billing feature page.
Step 5: Lock the period after invoicing
Once month-end invoicing is done, and payroll too if it uses the same hours, set the lock date to the last day of that month. From then on, no entry on or before that date can be created, changed or deleted, not even by an admin. Your invoices and your time records stay in line.
Practical tips
- Reports that open cleanly in a spreadsheet: time reports and exports follow the reader's regional number format, so durations land as numbers, not text.
- Coming from Clockify: existing time can be imported by CSV. "Bring your customers, deals and time into OPS" walks through bringing your data in.
- Missing time: OPS can send reminders for missing time and works with time targets.
Common mistakes
- Invoicing before approval. Without invoice approved time only, unreviewed entries can end up on an invoice.
- Leaving the ticket field optional. You end up with entries called "support" and no customer behind them.
- Never setting a lock date. Someone edits last month after the invoice went out, and the numbers no longer match.
- Treating billable time as working time. They are two different records; for Belgium's working-time registration, planned from 1 January 2027, read "Setting up working-time registration for Belgium's planned 2027 rules" (this is not legal advice).
Start capturing every billable minute
Make the right fields required, agree on a weekly approval rhythm and lock each period after invoicing. That is an afternoon of setup for hours you can invoice and defend. Get started for free.