
Belgium plans to make working-time registration a normal part of being an employer. If you already log billable time in Xcellerate OPS, you are halfway there. This guide sets up the other half: working time, breaks, approvals and a clean handover to payroll.
TL;DR
- Working-time registration for employers is planned from 1 January 2027. The final text is not yet published, so treat every detail as provisional.
- Keep billable time on tickets and working time (clock-in, clock-out, breaks) side by side in one system.
- In order: targets and absence, clocking, weekly approval, a lock date after payroll, and a payroll export.
What is planned, in short
Belgium plans to make working-time registration mandatory for employers, planned from 1 January 2027. As of 27 September 2026 this is still a plan: the final text has not been published in the Belgian Official Gazette (Belgisch Staatsblad / Moniteur belge). Details can still change. Treat everything below as preparation and check the specifics with your social secretariat. For the background, read our guide to Belgium's planned time-registration rules.
This article is a practical product guide, not legal advice.
Working time is not billable time
Most MSPs already track billable time on tickets and project tasks. That is not the same as working time. A technician can work nine hours and bill six. The rest goes to internal work, travel, training or a ticket that turned out to be a quick fix. The planned rules are about hours worked, not hours invoiced.
Keep both in one system. Billable entries stay on tickets and tasks, as covered in "Stop losing billable minutes". Working time is recorded next to them, with clock-in, clock-out and breaks. You avoid a second tool, and you can compare both figures for the same day. The time registration and billing page covers time, timesheets and absence in one place.
Step 1: Set time targets, absence policies and public holidays
Start with expectations, not with the clock. In Settings, under People and access, you will find Absence and Time targets.
- Give each person a time target. A full-timer and a colleague on a four-fifths schedule do not have the same week.
- Set up your leave policies, so holidays and other leave are registered as absence rather than as missing hours.
- Add the Belgian public holidays for the year.
OPS can send reminders for missing time and gives you an attendance overview. Both only help once targets and absence are right.
Step 2: Have staff clock in and out and register breaks
Each person clocks in at the start of the day and out at the end, with one click. Breaks are logged separately. That way the time you report reflects the hours actually worked, not the time between arriving and leaving.
Tell your team why you are doing this and what happens with the data. A short message beats a policy nobody reads. Registered times can't be changed silently: every change is kept in an audit trail. That protects the employee as much as the employer.
Step 3: Set the rules for time entries
Open the Time and timesheets settings. Three settings matter most here.
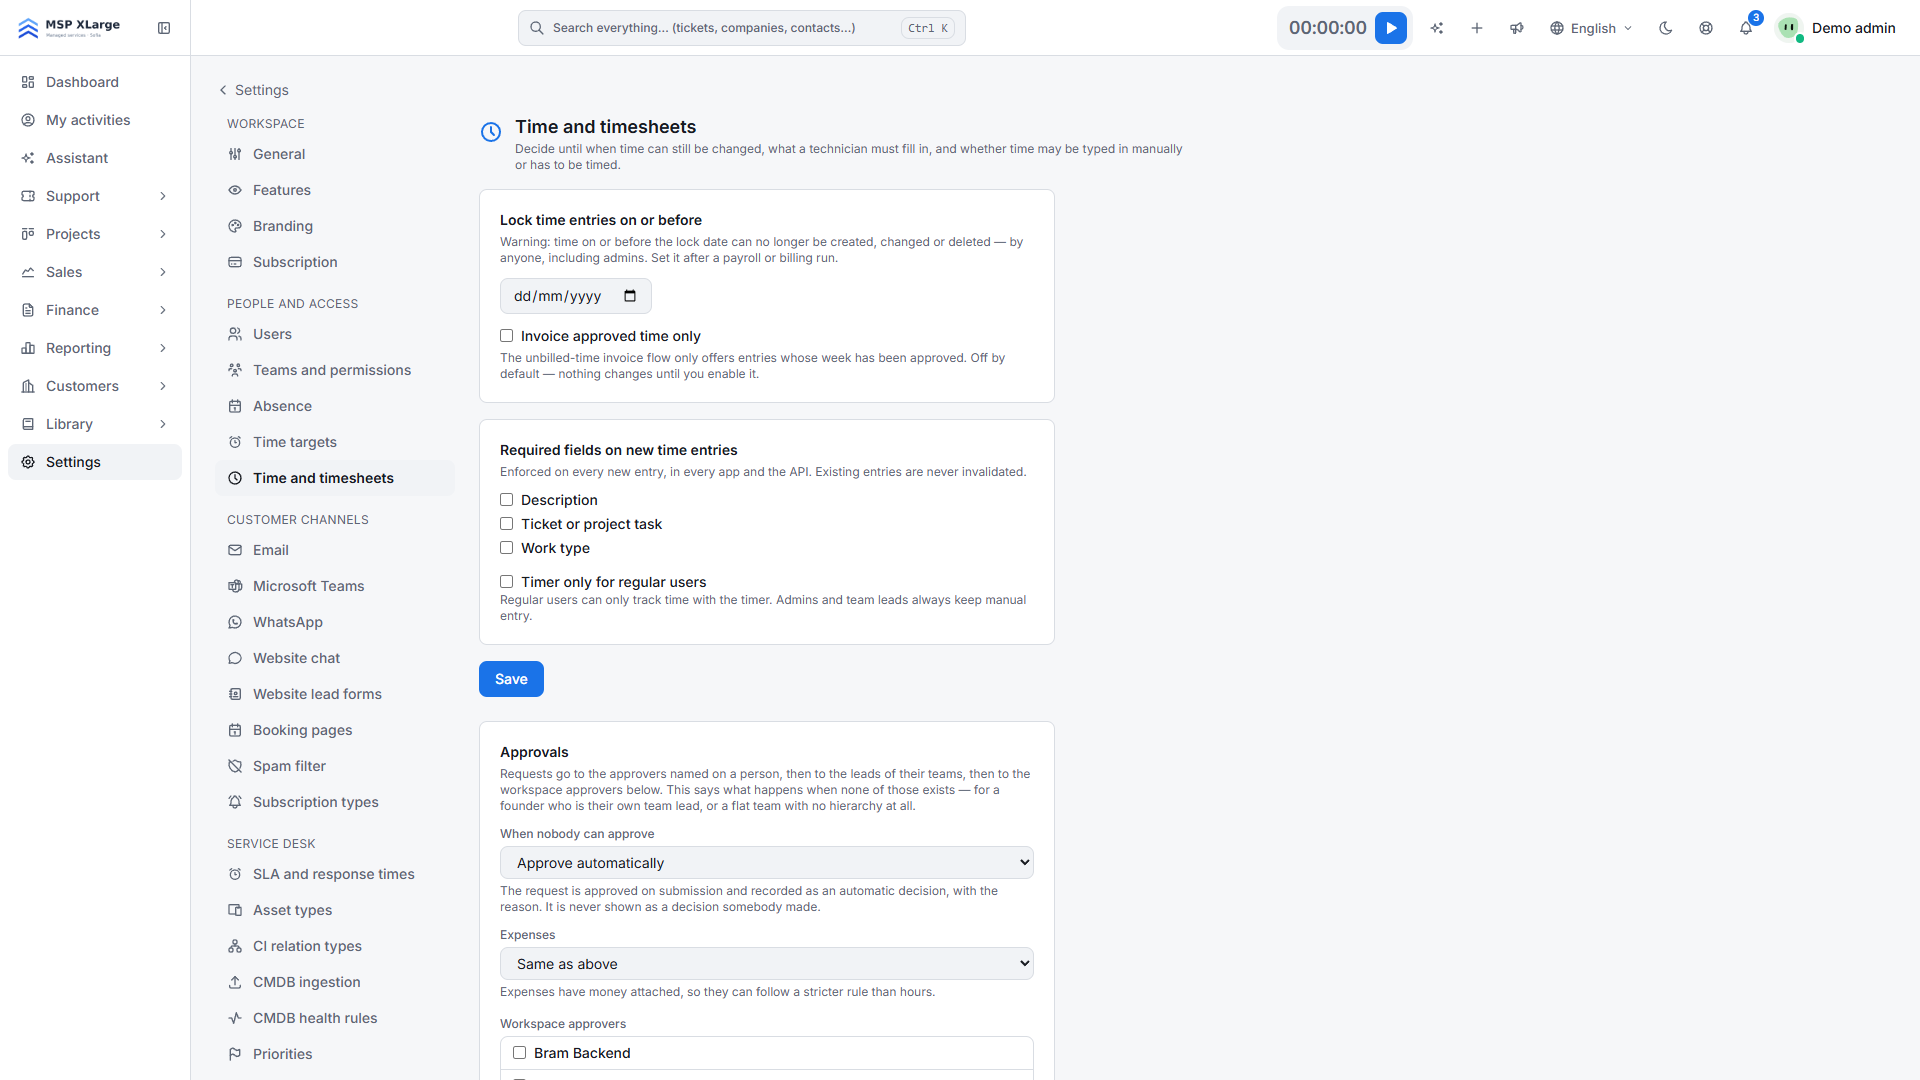 The Time and timesheets settings, with the lock date, required fields and approval routing.
- Required fields: choose what a new entry needs, such as a description, a ticket or project task, or a work type.
- Approval routing: approvals go to the approvers set per person, then to team leads, then to workspace approvers. You also decide what happens when nobody can approve, for example approve automatically.
- Lock date: lock time entries on or before a date. Leave it empty for now; you set it in Step 5.
There is also an option to invoice approved time only, and one to limit regular users to the timer. Admins and team leads can then still enter time manually.
Step 4: Weekly submission and approval
Pick a fixed day, for example Friday. Everyone checks their week and submits it for approval. The team lead or approver reviews the week in the team grid and approves it.
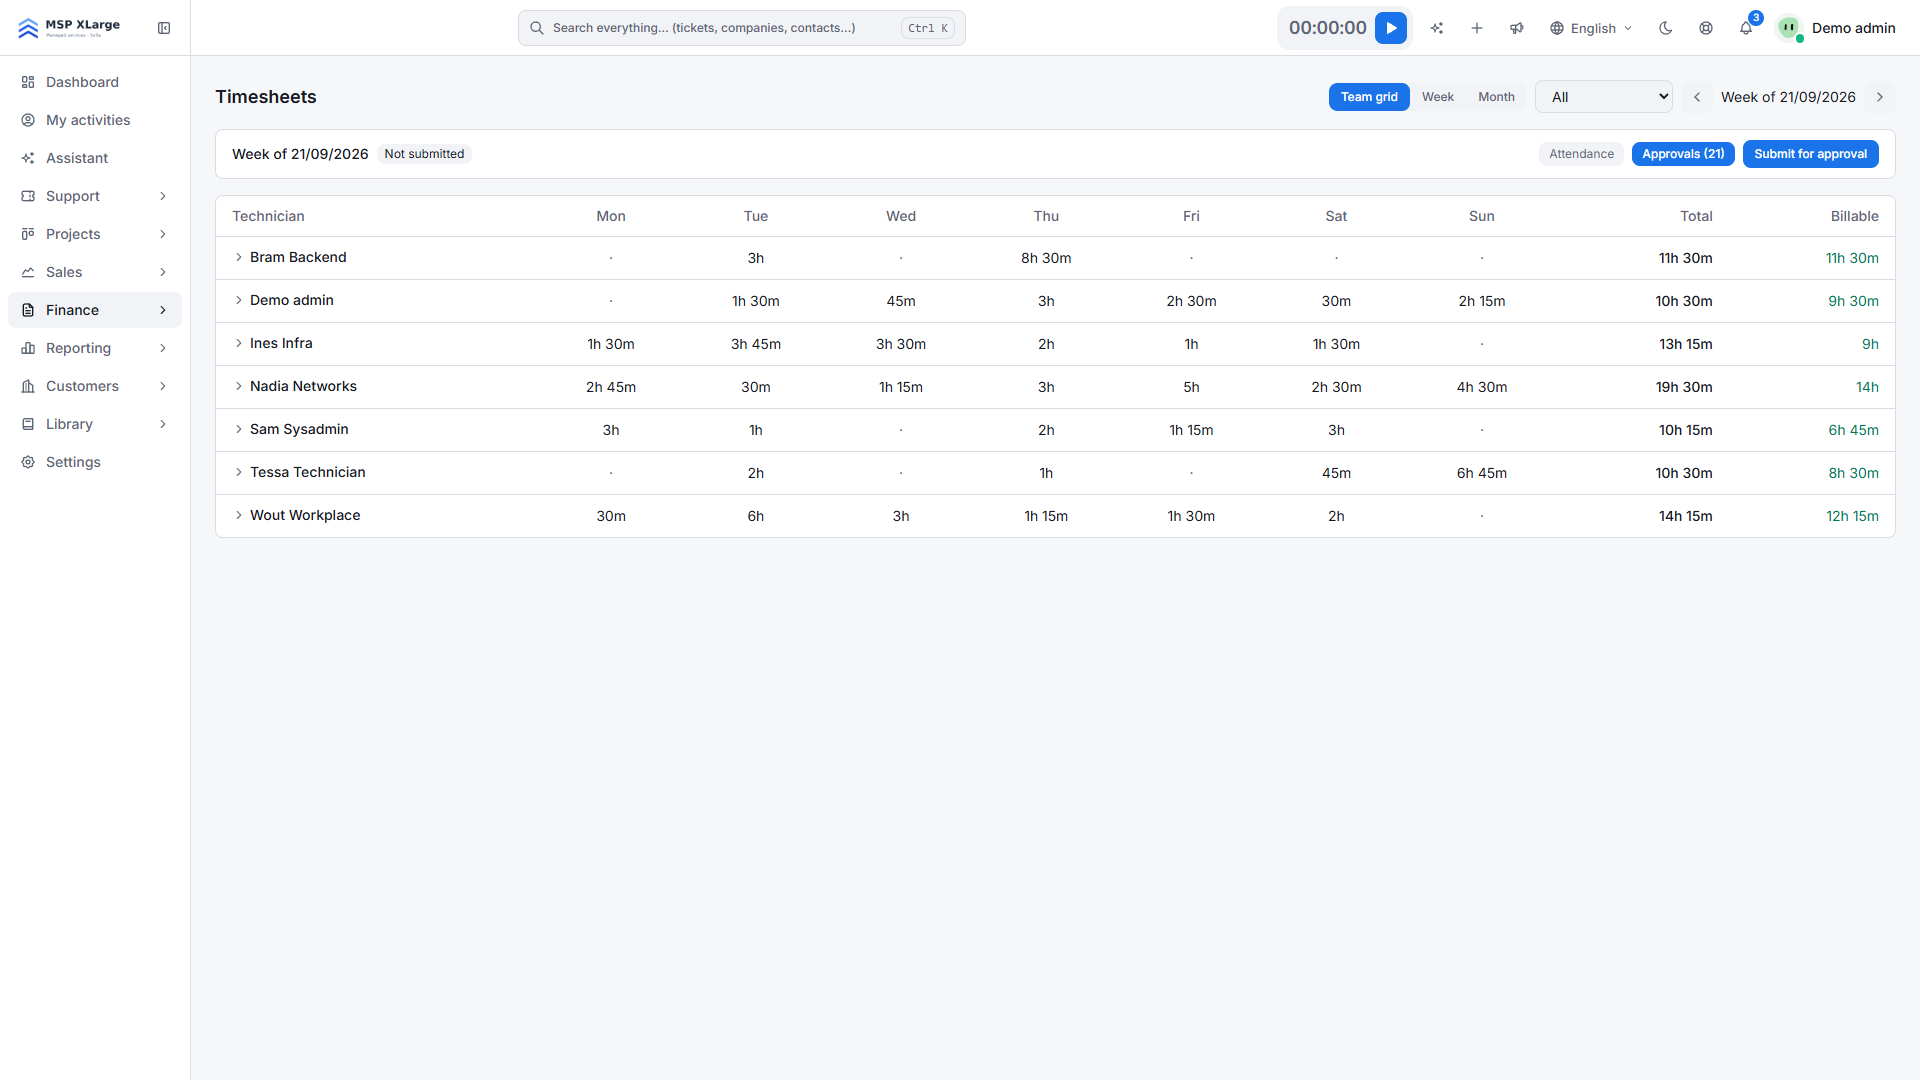 A weekly team grid with hours per technician per day, the total and billable hours, and the Attendance and Approvals options.
The grid shows total and billable hours side by side. A large gap between them is not wrong, but it is worth a question.
Step 5: Export to payroll and lock the period
Export the registered hours to payroll, so nobody has to retype timesheets. Ask your social secretariat which format and level of detail they expect.
Once payroll for the month is done, set the lock date to the last day of that period. From then on, nobody can create, change or delete entries on or before that date, not even an admin. Late corrections go into the next period, where everyone can see them.
Step 6: Review attendance
Once a week or once a month, open the attendance overview. Look for missing days, open reminders and people who are consistently above or below their target. Fix the cause, not just the number.
Common mistakes
- Treating billable hours as working hours. Nine worked and six billed is normal.
- Auto-approving everything because there are no approvers. Set approvers per team first; see "Teams, permissions and security". The security and access control page explains how team-based permissions work.
- Forgetting the lock date. Without it, old periods stay open.
- Starting on 1 January. Run the setup for a few weeks beforehand, so the habits are in place.
Get started
Want to try this setup with your own team first? Create a workspace and start with Step 1. Get started for free.